Last night some guildies and I ran through story mode and all three explorable paths of Ascalonian Catacombs. Just hours before publishing this article I did another run of path 1 and path 2. My experience was great and I came out of the dungeon feeling that the encounters were much more interesting. If this is Arena Nets vision for all the dungeons then we are in for a treat. Today I would like to quickly go over these changes to Ascalonion Catacombs and provide you with the strategies we used to clear all three explorable paths. Here is the official list of changes from the patch notes.
- Improved the skills on the cave troll boss.
- Additional ghostly allies will now join Kholer
- Removed breeders from the spawns during Hodgins’ search for the first scepter
- Rebalanced the graveling dungeon army to make them more interesting and fun to fight
- Revamped the Ghost Eater fight to include Detha’s traps
- Revamped the Colossus Rumblus fight to give him new skills and abilities
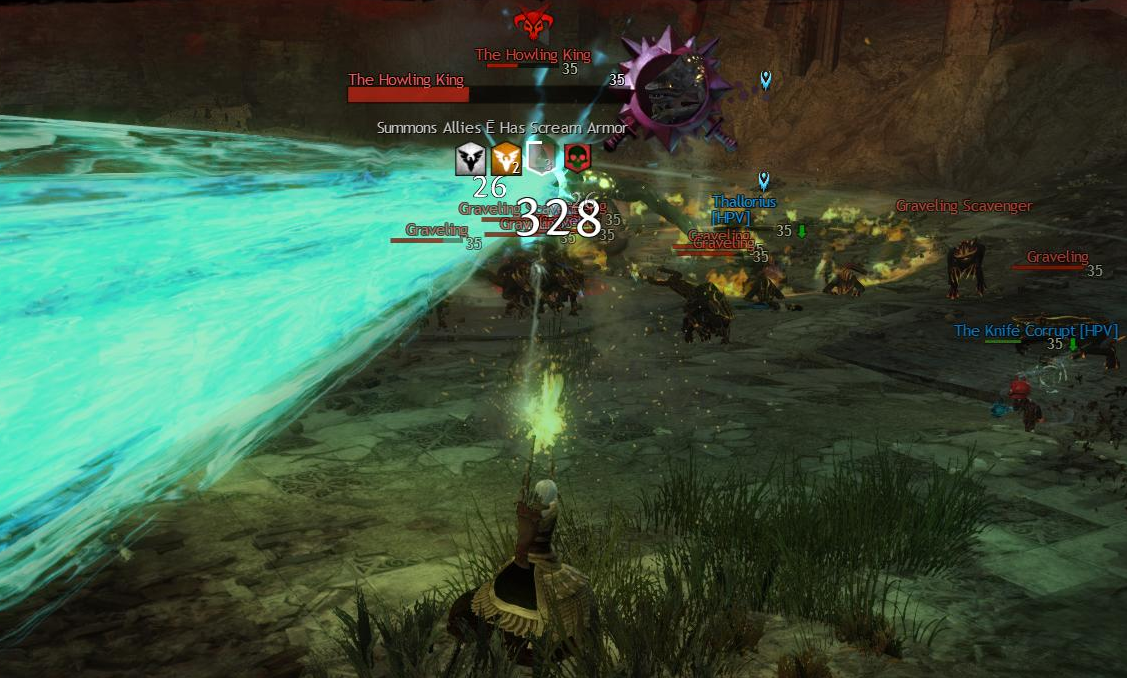
- Revamped the Howling King encounter and made changes to his army
- Adjusted the health of dungeon creatures and bosses
- Improved the skills on the cave troll boss.
- Additional ghostly allies will now join Kholer
- Removed breeders from the spawns during Hodgins’ search for the first scepter
- Rebalanced the graveling dungeon army to make them more interesting and fun to fight
- Revamped the Ghost Eater fight to include Detha’s traps
- Revamped the Colossus Rumblus fight to give him new skills and abilities
- Revamped the Howling King encounter and made changes to his army
- Adjusted the health of dungeon creatures and bosses
 These changes leave a lot open to interpretation which limits how I can write this article. I can not sit here and tell you facts about what was changed in every case. What I can provide is a narrative account of my group's and my own experience playing through this dungeon for the first time since the patch. Another thing to note is that not everything that has been changed has been recorded in the patch notes. Robert Hrouda had this to say on the forums when called out,
I am not in charge of the patch notes – that’s someone else job, and they decided that the patch note wasn't worth including. Keep in mind we have to translate these things, and there could be several reasons it was not included, from budget to time constraint. I am working with the people who write the patch notes though, to not drop off as many as they have been lately for dungeons.
Not having the full patch notes is kind of frustrating when writing an article like this but last night it led to a sense of mystery. We didn't know what to expect or what exactly had changed. In the future though I for one would appreciate all the details they are willing to give on the changes made and then I can decide to look at them or not.
 |
| The party that got it done. From left to right, Coal Blackroot, Thallorius, Me (Crushtastic), Arsenic Loki, and Keti Scheewolf |
 |
| The planning room. Which plan will you follow? |
Spiders, Trolls, and Kholer
 |
| Like Queen like spiderling. |
 |
| The Spider Queens web attack snares Keti. |
Another changed we noticed at this point was the big door blocking passage to the rest of the dungeon. This door does not disappear until the Spider Queen encounter is complete. I have never skipped the spider before as the reward it gives is worth the effort so this change actually does not effect me. I didn't even notice it on the first run through.
 |
| The Stalker evades my attacks. |
 |
| Kholer face tanks like a man. |
On the other two runs the Cave Troll spawned and we lured it to Kholer for a fight. Kholer beat the Troll on both occasions and we cleaned up. We could tell that the Troll had a number of new abilities including a glowing projectile attack which bounces from one target to the next. He also performs a jump with a radial knock back along five directions. I kind of wish they would put the Troll in places that forced your team to fight him. The temptation to lure him to Kholer for a show down is too great for most parties to turn down.
Path One
The next encounter to discuss is Path 1's Burrow Room. The burrows no longer spawn Breeders and instead they seem to spawn higher quantities of the lesser gravelings. I did this encounter twice and both times it proved a challenge. Both times we attempted the "traditional" method with one person defending and the rest taking down the burrows. Of the three or four times we tried this it always failed. As our experienced defender said, "Holy crap there are way more gravelings now." Other strategies that failed; a two pronged blitz across both sets of burrows, three defenders with two attackers, and two parties for each side of the room.
 |
| Map of the strategy outlined. |
A, B, C quickly destroy the western burrow while A moves on to the next burrow in the chain. B and C stayed behind where the first burrow was to screen the gravelings and finish them off. While this is going on D and E are killing the trash the comes out of the upper burrow without killing the burrow itself. Once B and C clear their gravelings C moves to the eastern side of the room to join D and E. B stays on screening duty (2nd image).
At about this point A will finish off their burrow and will join B and finish off any gravelings in the area. Now the action shiftd to the eastern half of the room. C will continue screening the upper burrow while D and E break off and down the final burrow in the first chain (3rd image).
Once that burrow is destroyed a lot of pressure is relieved. A and B will probably still be dealing with gravelings on the western half of the map while C, D, and E finish up the upper burrow and the one that comes after it. Each time they are leaving someone behind to screen and clear the gravelings that that left over. Once the final mound appears A and B will be in good position to attack it while C, D, and E protect Hodgins from the remaining gravelings (bottom image).
This wasn't easy either time we went through. When we did finally lock down the strategy it felt right and it actually went REALLY smoothly. It might not happen the first time you try. Don't be discouraged. You might need to come up with your own strategy for your party composition. Having the right people in the right place goes a long way.
 |
| The Death Beam. Don't get derped. |
 |
| Another death beam shot. Notice the fire traps. |
Path Two
Next lets talk Path 2. The first encounter in this path is the trap room. Both times the trap room went down smoothly. In both instances, I took on the role of kiting the gravelings while the other four worked the traps. I derped on the second go and let the Breeder get past me. Luckily my party was fast acting and the person with the Breeder's agro joined me kiting and another took over the centre trap. I payed for my derp with my life so at least there was that justice. The first try though I did it no problem. I didn't even go down and usually I do (not that it is a big deal as you just rally of a dying graveling) and I was kiting on my own which I don't normally do.
 |
| Bathing in the AoEs. |
 |
| The "Ghost Shield" buff. Also notice the boss' description. |
 |
| The Ghost Eater in Ghost mode next to a trap. |
 |
| When the trap explodes a bright wave of light passes over the Ghost Eater removing his buff. |
Some general tips for this encounter would be to have all party members turn off auto attack. Attacking the Ghost Eater while he has his buff up will only cause oozes to spawn that will eventually heal him. Also, assigning party members as either pull and lift before you start and sticking to these assignments will help. Nothing is worse then lifting an ooze at the same time three others do. If your party is extremely coordinated then you might even have two groups with one pull and one lift in each focusing two oozes. My groups simply targeted an single ooze. The lifters lifted and the pullers pulled. Sometimes this was dicey but it got the job done.
Path Three
Finally, we come to part 3. I only ran this path once on the first night after the patch. And unfortunately all my screenshots from the first night didn't actually get taken. I blame FRAPs, FRAPs blames me. Whatever. There isn't much too see in this path that is different anyway. Most of the screenshot below were taken from this video which I have embedded below.
The Lovers room went down with no problems. We just ran from burrow to burrow quickly downing them. We weren't pro or anything and after the first five or so burrows were spinning around looking for the next one. Common sense of targeting the burrow when you see it payed off and we breezed through.
The Lovers room went down with no problems. We just ran from burrow to burrow quickly downing them. We weren't pro or anything and after the first five or so burrows were spinning around looking for the next one. Common sense of targeting the burrow when you see it payed off and we breezed through.
 |
| You can see the large AoEs from the roof collapse. |
Hmm, that seems like a bug. It was intended that you could interrupt the howl that caused the rocks to fall. I’ll send that over to our QA and get it verified.
 |
| Here the tell that indicated Rumblus is about to make the roof collapse. |
The final thing to mention about this encounter is that there might be a safe spot outside Grast's shield. While we were playing we noticed a spot under the archway of the ruins that seemed to be devoid of falling rocks. Shortly after spotting this we finished the encounter without getting a chance to test this. I did find this Youtube video of a guy using that spot to his advantage though.
It hasn't been confirmed on whether this is intentional or not but while the rest of the event is bugged I see no harm in taking advantage of this. This is a challenging fight without a doubt. Once the bugs are fixed it will most likely be enjoyable. Being able to interrupt the roof caving in will go a long way. Personally, I wish that the shield ability that Grast performed was in the hands of a player. Relying in an NPC is lame. Instead I feel there should be an item that a player can hold to generate the shield or be a thing sitting in the middle of the room that can be activated.
I think this has turned into the longest post I have ever written (I am also still finding grammer errors. Sorry one man show here!). There was a lot to talk about and I am not done yet! A lot of my guild mates have been asking me, "Is AC easier or harder now?" My answer to them is that it is neither. Some parts are easier some parts are harder. Overall, I would say it is more interesting. The mechanics for the boss fights are challenging and exciting. They definitely keep you on your toes and require cooperation. The only thing I would say this dungeon needs now are more spotlight moments and it would be brilliant.
If this is the path that Arena Net plans to take with all the dungeons then by all means carry on. These changes are excellent and much needed. I would also imagine that a number of new strategies will emerge in the next couple weeks that will help everyone in completing these dungeons in record times. The biggest hinderance to running the new AC will be your previous expectations to what the fights will be like. Go into the Spider Queen fight assuming the AoEs are no big deal and you will die. Assuming you can get away running dungeon without a stun removal will get you killed. If you put your brain to the task though and drop your expectations you will be fine. Just do not expect PUGs to know what to do or for that matter to even be aware that the dungeon has changed for the next month. If you aren't willing to put up with a wipe or two then do not run this dungeon until people learn what they are doing or stick with those that you know have completed it post patch.
Sorry about the long post. I hope some of you have made it to this point. If so, let me know what your take on the new AC is? Have you run it? If not, what do you think of my take on it? Does it make you want to find a group and get out there and give it a go? Or does it intimidate you into not wanting to try? Let me know in the comments!
Conclusion
I think this has turned into the longest post I have ever written (I am also still finding grammer errors. Sorry one man show here!). There was a lot to talk about and I am not done yet! A lot of my guild mates have been asking me, "Is AC easier or harder now?" My answer to them is that it is neither. Some parts are easier some parts are harder. Overall, I would say it is more interesting. The mechanics for the boss fights are challenging and exciting. They definitely keep you on your toes and require cooperation. The only thing I would say this dungeon needs now are more spotlight moments and it would be brilliant.
 |
| Meh loot. Thanks Kholer. |
Sorry about the long post. I hope some of you have made it to this point. If so, let me know what your take on the new AC is? Have you run it? If not, what do you think of my take on it? Does it make you want to find a group and get out there and give it a go? Or does it intimidate you into not wanting to try? Let me know in the comments!
Amazing post! Keep up the great work!
ReplyDelete