Showing posts with label review. Show all posts

Living Story: Gathering Storm part 2

Yesterday I started discussing the changes to the Living Story by going over the additions to Hoelbrak, the Black Citadel, and Lion's Arch. Today I would like to finish by looking at the achievements you can complete, the new content in Wayfarer Foothills and Diessa Plateau, and provide you with my thoughts and speculations on the Living Story so far. There is a lot of stuff to go over so I will get right to it.


Achievements


The first thing to know is that most of the content from the February patch is still available. If you haven't finished your volunteer title you can still head out into Diessa and Wayfarer and help the stream of refugees heading through the zones. There is a lot to do which you can find more details about in my article reviewing the February content


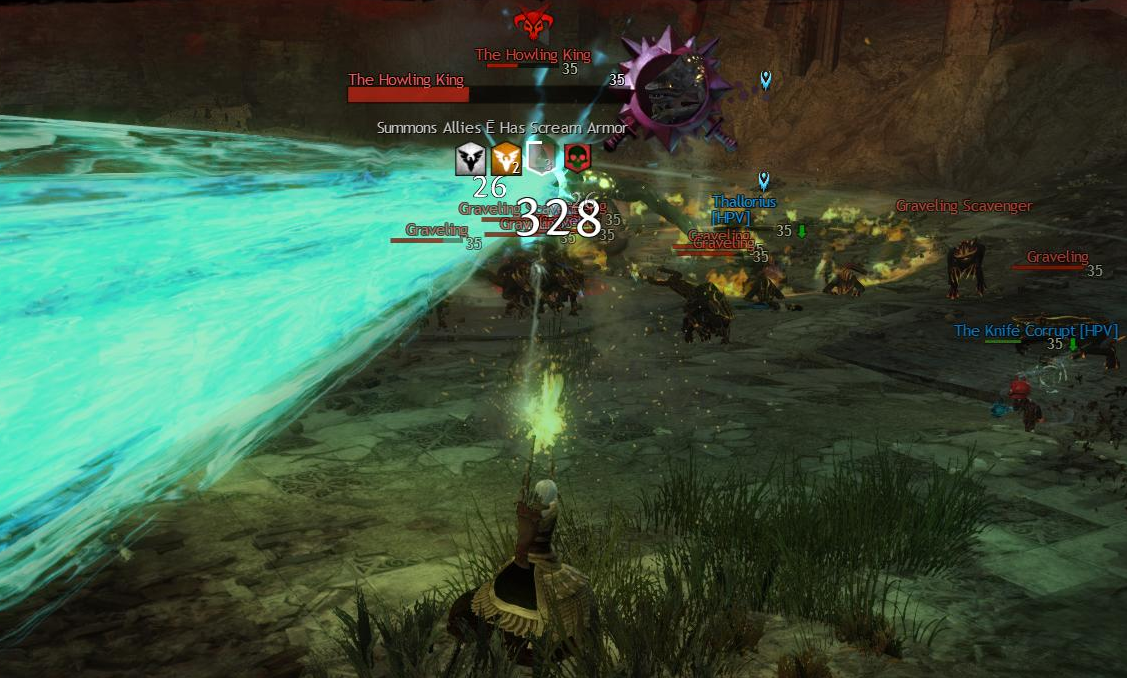
The new content introduced with the latest patch runs in conjunction with the old giving players plenty of time to finish their achievements. There are two new achievements for players to complete this month. The first is titled "The Gathering Storm" and has players defeating Invaders. Dredge and Flame Legion are attacking various targets in the Norn and Charr lands. You will need to kill 150 of them to complete this achievement. In the map below I have marked the location of some of the events where you can find the Invaders. They are marked with a circled flag or a circled gear.


The second achievement is called "Lost and Found" and has players locating trinkets lost by the refugees. The refugees missing the trinkets can be found in Lion's Arch (see yesterday's post). Currently there are two trinkets to locate; Kirk's Goblet in Wayfarer and Malia's Toy Soldier in Diessa. They will spawn at a random location in the zone and you will need to track them down (Dulfy has a map marking some of the possible spawn locations). They can be tricky to find and I wish the NPCs gave in game hints to help you find the specific location. What you are looking for is a sparkling object on the ground (see images below). If you hold CTRL down, as you are exploring, the name will pop up above the object, if it is nearby. Don't give up! If you can not find it right away don't be afraid to ask if anyone has seen it in map chat. 

Once you have found the missing trinkets return them to their respective owners in Lion's Arch. You will be thanked for your efforts and learn what the character plans for the future. Here is Malia's response,

I love this little story. She didn't get to visit Tixx during Wintersday so her now legionnaire made her a replica. Sadly, this legionnaire is now MIA. Touching story and I am glad I could help out. And here is Kirk's response,

Good thing we returned Kirk his mug. Sounds like he will have a tough future and will need a stiff drink every once in a while. Once you have helped Kirk and Malia keep your eyes on Lion's Arch for new refugees needing assistance. Presumably, at least four more refugees will be added over the coming weeks. When they do show up I will let you know here.


Diessa Plateau


Most of the new content in Diessa Plateau is located in the Northeastern parts of the zone near Butcher's Block. The Invaders are swarming into Diessa through Flame Legion portals and Dredge personnel carriers (circles with gears on the map above). These events were not easy on my poorly geared level 60 Mesmer. The Invaders respawn quickly and you can not damage the portal or personnel carrier until you defeat the spawned mobs. Keep at it and call out for help. There are lots of people looking for Invaders to kill in order to finish their achievements.


But, wait there is more. There is also a Charr ranch that will occasionally be taken over which will require liberating (circle with a flag on the map above). I liked seeing this event added to the game because you actually get to see some of the devastation caused by the invasion. It helps me stay immersed in the content.


The last thing of note in Diessa were Flame Legion troops within the Dredge camp at the Burrows of Moledavia. I also checked Flame Legion bases in the area but did not find any Dredge. This seems to be telling of who has the pants in this relationship. I had already finished my "kill invaders" achievement when I found this so I was unable to discover if these guys were included for the kill count (Bhagpuss confirms in the comments they do not count). If they are they would be easy targets to get you closer to your 150 invader kills.

Zola Swiftstep, who I talked about in a blog post on Monday, is still waiting for the Flame Legion attack and seems completely unaware that the Invaders are already here. Maybe this is an oversight by Arena Net or maybe she is keeping tabs on a different Flame Legion base. I hope we see her involvement in events shortly. There are also steam vents north of the Burrow of Moledavia, which haven't changed since I highlighted them in a blog post a couple weeks ago.


Wayfarer Foothills


The changes in Wayfarer Foothills are in many ways symmetrical to those in Diessa Plateau. Often when I find a change in one zone I make note of it and expect to find a reciprocal changes in the opposite zone. For example, you can fend off the invaders portals and personnel carriers here in Wayfarer as well.

There is also a Norn homestead that needs defending. Again adding to the realism of the refugees situation although I would have like to see more homesteads attacked to explain to quantity of homeless seen in Hoelbrak, the Black Citadel and Lion's Arch. One homestead is better than none though.


The final thing to note in Wayfarer is that the Merchant Bodyguard has disappeared. He used to be standing in the tent show below. I talked about him and the dead merchant a couple weeks ago in a blog post. Check it out for more details on this story. The dead merchant is still in the same place and nothing has changed so you can check that out in game (marked on the map above).

I looked around a little more and could not find any other changes. As always, if I have missed something let me know in the comments.


The Castle


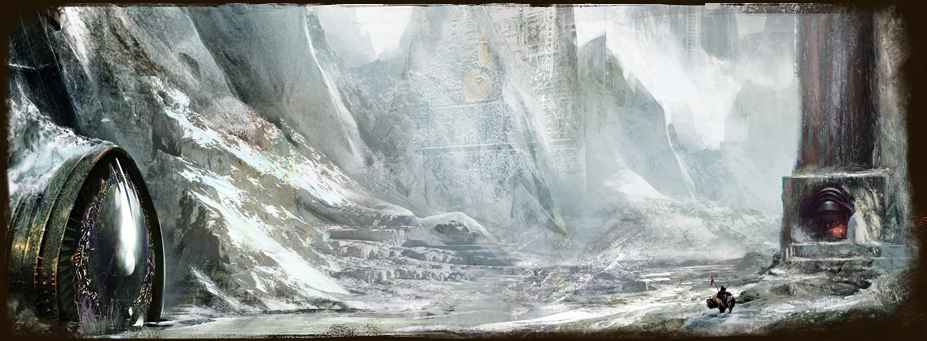
The last thing to mention is the castle which as popped up on the Steaming Mountain. This is probably the single largest and most obvious change this patch so I felt it deserved it's own section. I have taken a number of screen shots of the castle and noticed a couple interesting things about it but there are still a lot of questions. As you can see in the image below the fort is actually quite extensive reaching up the mountain.

The gates to the castle are formidable and there is a large invisible wall keep players well back from it (presumably to prevent people from glitching through and seeing what is on the other side).

I have tried to get various angles on the castle to see if I can peer inside. My first attempt revealed a second gate beyond the first.

Looking from another angle I spotted wolf totems within the walls. What are wolf totems doing inside this castle? I originally thought this castle would have been built by the invaders. Perhaps that assumption is wrong.

If you head over to Diessa Plateau you can get a view from another angle. Although you can not see the wolf totems you can see something else of note.


To me that looks like a crest with a wolf on it. So did the Norn build this castle? Do they still control it? There isn't much in game that helps us answer these questions, yet. I could speculate all day about what this could be. I hope to get some facts soon.


Conclusions


Overall, a lot of my concerns about the Living Story have gone away. I criticized the Living Story last week for attempting to tell a story of a scale they were not showing in game. Things have changed in a big way and I am glad to see Invaders and destroyed homes in the world. It adds to the authenticity of the story and helps me stay immersed. I would still like to see some more damage in the world to reflect the scale of the events described by the NPCs.

The only criticism I will level at the new content is towards the "Lost and Found" achievement. I did not like having to wander aimlessly around. I would have much preferred to have been given a hint to it's approximate location instead of just being told which zone it was in. Perhaps, a dialog option on the refugees to ask them where they last saw their prized possession. A minor detail I am sure Arena Net will polish out in the future.

As for the quantity of content I find it hard to judge at this point. Arena Net has stated that we are still within the teaser content and that the story won't really pick up until the end of March. Until we start getting that content I do not see how I can pass judgement. I hope Arena Net will be able to deliver the quantity of content that players are looking for on a weekly basis. If it ends up being as much content as we got this patch every week I believe most people will be very happy. I know I would be.

Personally, I am really enjoying learning about all the characters. The situation with the Grawl is interesting. They seem to be treated like third class citizens and they are not very happy about it. They also do not seem to trust the Consortium. I expect something to become of this and I hope players get to choose sides. Do you help the disadvantage Grawl? Or the powerful consortium? This would really give players a chance to build their character.

Some in my guild suspect that the Consortium or some other agency is acting as a puppet master getting the Dredge and Flame Legion to do their bidding. I am not so sure. I do not think the story will be that complicated. I think it is more likely that the Consortium is merely taking advantage of this situation for PR purposes. I think the Flame Legion is the main force behind this and in return for their services the Dredge have been promised something in return. The first bit of evidence for this are the Flame Legion troops I discovered in the Burrows of Moledavia. This suggests that they are in charge since there are no Dredge troops in the Flame Legion bases. Secondly, the Dredge have most likely not given up their recently earned freedom to the Flame Legion. I think it makes more sense for the Flame Legion to be paying the Dredge for their services. All pure speculation but I do think my reasoning has merits.

As always let me know if I missed anything. I would also love to hear your theories about future events. Also, let me know what you think is the most interesting story covered so far. Thanks for reading my review of the Gathering Storm Living Story content and be sure to check back in the coming weeks for my updates as new content is released.

Living Story: Gathering Storm part 1

The latest patch brings a lot of changes to the Living Story. As always, I have documented those changes to the best of my ability and today I have screenshots and much more to share. There are changes in all four zones, Wayfarer Foothills, Diessa Plateau, Hoelbrak, and the Black Citadel, and the story has spread to Lion's Arch. I have previous outlined changes to the Living Story throughout February here, here, here, and here. Today I will go over the changes in the cities and introduce the events thus far. Tomorrow, in part two, I will look at the action in Wayfarer and Diessa and detailed conclusions.


A quick summary of the events so far would go like this. Disaster has struck Wayfarer Foothills and Diessa Plateau. Steam is escaping through underground fissures and is causing changes in the weather patterns. At the same time there are rumours of Flame Legion and Dredge attacks in the affected areas. Players have been actively participating in these events by plugging fissures and helping the refugees on their journey.

With the latest patch the stakes are upped, rumours are confirmed, and new questions are raised. A blog post by Angel McCoy on GuildWars2.com gives us a sense of where Arena Net is headed with the story in March,
With the February release, we’re further advancing the Flame and Frost storyline in fun ways, but we still consider this to be teaser content. You’ll get to experience saving homesteaders and ranchers in a more direct way, no longer just as volunteers, but becoming actual defenders of the residents of the Wayfarer Foothills and Diessa Plateau.
And beyond, 
These first couple months of teaser content have allowed us to ramp up to make the long-term Living Story an even fuller and more satisfying experience for you all. As designers have come off other projects and joined us, we've increased the amount of content we’ll be delivering, starting at the end of March.
March sounds like it will be another slow month with the main bulk of the content coming in the next patch and beyond. The amount of content released on Tuesday is nothing to laugh at as it easily exceeds everything released in February put together. If we can come to expect this much content in the Living Story on a weekly basis then I really think Arena Net is on to something. The Living Story really will become like a TV show that you can tune into each week. Enough generalities. Lets talk specifics.


You've got mail


Each race received a different letter introducing the new content. I thought it was neat that they added this touch. Luckily I have a character of each race and was able to get each letter. Here they all are for those that are interested.

Firstly, a letter for Asura players from Zojja,

Savant, 

An individual who claims some preposterous connection with a former colleague of mine recently contacted me, and while his claims concerning that connection are dismissible he does bring up a good point. Refugees have been streaming into the Black Citadel, Lion's Arch, and Hoelbrak from the northwestern quadrant of the Diessa Plateau and the northeastern quadrant of the Wayfarer Foothills. I don't know what's going on there - and I'm too busy to investigate personally - so, it will have to be you. Go look into it at your earliest convenience. Don't bother reporting back. I trust you to handle the matter with efficiency and style. 

Good luck, and watch your ears out there.

- Zojja 
Secondly, a letter from Caithe for Sylvari players,

Valiant,

I've got a job for you. My friends (most days) Rytlock and Eir have requested help. I can't go myself - Nightmare Court trouble - so I'm sending you instead. If you will go, of coarse. Here's all I know - some nasty situation in the Shiverpeaks is killing norn and charr on either side of the mountains. It's gotten ugly, and the survivors have started migrating to Hoelbrak and the Black Citadel to get away from... whatever it is. Take your pick. Go to either the Wayfarer Foothills or to Diessa Plateau, and see if you can assist the fleeing norn and charr. Watch out for their injured pride, though. It's likely to be the sharpest thing you encounter. I'll see you soon.

- Caithe


Next, a letter from Rytlock Brimstone for Charr players,


Your characters name - 


Interrupt your current orders. Recent events in the Black Citadel require your attention. Refugees from northwestern Diessa Plateau have been flooding into the city, and it sounds like the same thing's happening over in Hoelbrak. I'm even hearing reports that they're seeing refugees as far west as Lion's Arch. Get there as soon as you can. WE need all bodies responding to this. I've got refugee troubles up to my eyeballs, so you'll be my soldier in the field on this one. Just do the best you can to help them. 


- Rytlock

Eir Stegalkin calls out to Norn players in this letter,

Slayer, 

You're needed in Hoelbrak. An upsurge of dredge has forced steadholders out of their homes, and they're arriving broken and battered. Knut and I are doing all we can to heal the wounded and to arrange food and shelter, but it takes time. I need someone who can go up into the Wayfarer Foothills, towards Dolyak Pass, and help anyone left behind or still fighting. We're not getting accurate reports from the area, so I'm not sure what's happening up there. 

Rytlock sent notice that he's experiencing the same thing in the Black Citadel. Charr refugees are fleeing to the city as their home are being destroyed and their friends and family massacred. Much like here. I hope he's handling it better than we are here. Organization has never been one of our more epic qualities. 

- Eir

Finally, Logan Thackeray reaches out to human players in this letter,

Dear your characters name, 

I reach out to you with the utmost urgency. It has been brought to my attention by two other members of Destiny's Edge that they're experiencing some trouble in Hoelbreak and the Black Citadel. Something, or someone, is burning both norn and charr out of their homes and forcing them to seek shelter and security in the cities. This is unprecedented, and I'm concerned. As a favor to my friends, I'm asking you to travel to one or both of these cities and see if you can offer any assistance. If this is as bad as they say, it may eventually threaten Krytan citizens as well. You're the perfect choice to deal with this. I'd help, but I have the queen's business to attend to. 

- Logan

All of these letters essentially give the exact same information. What is nice is that it highlights some of the interplay between the members of Destiny's Edge that we see in the dungeons and personal stories. It was something that Arena Net could have easily gotten away without doing and most likely most players will not even notice this. I thought it was neat enough to point out and share. Also, let the Logan jokes begin...


Hoelbrak


The source of most of the news in Hoelbrak is the refugee coordinator found at the entrance to the refugee camp between wolf and bear lodges. The refugee coordinator's dialog has not changed since Monday but it makes a lot more sense in the context of the rest of the changes that came on Tuesday with the patch. Here is what she currently has to say,


On Monday, there was no evidence of refugees in Lion's Arch and the generous benefactor was a mysterious character. Both issues have been cleared up as I will discuss below in the Lion's Arch section. This coordinator also confirms the the rumours of Flame Legion and Dredge involvement in the recent disaster. For the first time players can confirm this for themselves. I will have more details on that in the Wayfarer Foothills and Diessa Plateau sections tomorrow.

There is a new NPC in the Hoelbrak refugee camp, another blacksmith. Here is his dialog.


He also confirms that the Dredge and Flame Legion are working together. The only other thing that has changed in Hoelbrak is the dialog of the Heralds that you can find near the Asura gate to Lion's Arch and the exit to Wayfarer Foothills. There isn't much here but I have the dialog below for completeness sake.


I am still disappointed that none of the Whitebear's (Knut, Sigfast, Skarti) have anything to say on the event. They are the leaders of the Norn people and the Wolfborn so they must be involved. This is a small detail though.


Black Citadel


The story in the Black Citadel is similar to the one in Hoelbrak. The Herald has new dialog.


As before he directs us to the main refugee camp near Memorial Waypoint in the northern end of the Black Citadel. He also gives an overview of the problem in Diessa Plateau and Wayfarer Foothills. Heading over to the camp we find that the coordinator's dialog has changed as well. Here is what he has to say,


Again we get news that the refugees are beginning to move to Lion's Arch. That is where I will be heading next. There is a lot to learn there. Exploring the Black Citadel further and talking with Rytlock reveals he still has nothing to say on the matter despite being a leader of the Charr  I suppose the interaction we receive with him is through his letter to the Charr characters. Finally there is a new NPC, a refugee cub, who has interesting details about her attackers,


Ah, so the Flame Legion are using the Dredge weapons. I wonder why? Aren't their own spells and magic enough? I do not get that. I will have to keep it in mind though.


Lion's Arch


Lion's Arch appears to be the new hub of activity for the refugees. We can start off by talking to the herald near the Asura Gates or north of the bank, although they will just direct you to Wayfarer and Diessa.


Next, if you look to your map you will see a star near Farshore Waypoint in the southeast section of the zone. This indicates the location of the refugee camp in Lion's Arch. If you head here there is a lot to learn.


One of the first characters you will encounter is this Lionguard who seems to be acting as the camp coordinator. Talk to him to get an overview of the camp.


Seems our friends from the consortium are back. They are the mysterious benefactors we learned about on Monday. We first met them during the Karka Island events in November. I was wondering if that story line would some how connect into this and its seems it may. Talking with the various consortium agents you can learn a lot. Administrator Elpida Callis is in charge.


She tells us of a plan to help relocate the refugees here in Lion's Arch and to Southsun Cove. Something seems fishy here. Like read the line where she says, "we Consortium, <sarcasm>out of the kindness of our hearts</sarcasm>, have put together..." Did you hear the same sarcasm I did when reading that? A guildmate of mine even went so far as to suggest that the Consortium hired the Flame Legion and Dredge to attack the Norn and Charr in the first place. I am not so sure yet. This administrator seems like a smooth operator. Wouldn't put anything past her. She also speaks of some objects lost by the refugees on their journey here. To find them we will have to head to Wayfarer Foothills and Diessa Plateau (more on this tomorrow). Before that though there are a couple other consortium employees we can talk with.


How rude. This one seems shady. I will have my eyes on him. Maybe this other representative will know more.


Not really. The fact that the Consortium seems to take every advantage to brag about their accomplishments seems to suggest some other motive. Maybe they are just braggarts. Looking around the camp there is a group of grawl. It seems they have been effected by the disaster as well. No one ever thought about them.


Their leader has a lot to say. Seems like a new controversy is growing.


The Grawl seem to be the refugees of the refugee camp. Are we seeing some discrimination here? I wish I had checked this area out more before now to see if the Grawl actually were there first. It will be interesting to see how this story plays out. Perhaps something will grow out of this conflict. Or maybe Arena Net is just setting us up to have a soft spot for the Grawl.

Next there are two refugees that need the players help. You can talk with them to get their individual stories.


Seems this young charr has lost her toy wooden soldier. While exploring Diessa Plateau be sure to keep an eye out for this. There is also a Norn you can speak with.


And, typically, this norn is nothing without his favourite beer goblet. He has dropped it somewhere in Wayfarer Foothills. I will have more about both these stories in tomorrows article.


Conclusions


I am going to avoid drawing too many conclusions until I finish this article tomorrow with a look at Wayfarer Foothills and Diessa Plateau. In general though, I am feeling upbeat again about the Living Story. There is a lot of new content to explore and with the ramp up coming next month I think this will become a great part of the game.

Which of the story lines presented in the cities so far most interests you? Do you think the consortium has any malicious intent? or is it really all generosity? Will the anything become of the grawl's exclusion? Will the norn Kirk ever be reunited with his lost ale goblet? I will keep discussing these topics tomorrow. Let me know what you think of the Living Story so far in the comments. See you tomorrow for part two.

The *new* Ascalonian Catacombs

Last night some guildies and I ran through story mode and all three explorable paths of Ascalonian Catacombs. Just hours before publishing this article I did another run of path 1 and path 2. My experience was great and I came out of the dungeon feeling that the encounters were much more interesting. If this is Arena Nets vision for all the dungeons then we are in for a treat. Today I would like to quickly go over these changes to Ascalonion Catacombs and provide you with the strategies we used to clear all three explorable paths. Here is the official list of changes from the patch notes.

    - Improved the skills on the cave troll boss. 
    - Additional ghostly allies will now join Kholer
    - Removed breeders from the spawns during Hodgins’ search for the first scepter
    - Rebalanced the graveling dungeon army to make them more interesting and fun to fight
    - Revamped the Ghost Eater fight to include Detha’s traps
    - Revamped the Colossus Rumblus fight to give him new skills and abilities
    - Revamped the Howling King encounter and made changes to his army
    - Adjusted the health of dungeon creatures and bosses


These changes leave a lot open to interpretation which limits how I can write this article. I can not sit here and tell you facts about what was changed in every case. What I can provide is a narrative account of my group's and my own experience playing through this dungeon for the first time since the patch. Another thing to note is that not everything that has been changed has been recorded in the patch notes. Robert Hrouda had this to say on the forums when called out,
I am not in charge of the patch notes – that’s someone else job, and they decided that the patch note wasn't worth including. Keep in mind we have to translate these things, and there could be several reasons it was not included, from budget to time constraint. I am working with the people who write the patch notes though, to not drop off as many as they have been lately for dungeons.
Not having the full patch notes is kind of frustrating when writing an article like this but last night it led to a sense of mystery. We didn't know what to expect or what exactly had changed. In the future though I for one would appreciate all the details they are willing to give on the changes made and then I can decide to look at them or not.

The party that got it done. From left to right,
Coal Blackroot, Thallorius, Me (Crushtastic),
Arsenic Loki, and Keti Scheewolf
I have now run AC path 1 and 2 twice since the update and path three once. All my runs were with guildies. We did not use voice communication at all instead we relied on party chat. I ended up running with a variety of people but I had two primary groups. The first group consisted of four 80s (a thief, an engineer, a warrior, and a guardian) and a 35 (an elementalist). I couldn't tell you what each build is; however, as a group we had decent DPS and were fairly beefy. The second group consisted of five 80s (two thieves, a ranger, guardian/engineer, and a necro). This group had more DPS but less survivability. I played my thief both times and ran with my Jack-of-all-Trades thief build. I also did a run through story mode. It served as a good warm up on the first night and we breezed through in under 20 minutes. There were no changes to this part of the dungeon so I will move on to the explorable paths.

The planning room. Which plan will you follow?

Spiders, Trolls, and Kholer


Like Queen like spiderling.
The first major encounter of the Dungeon is the Spider Queen. I ended up doing this encounter five times. On the first run we defeated it without issue. On the second run we wiped twice after spawning the Spider Queen before the spiderlings and gargoyles were defeated. We rallied and got it done. Our third attempt had no issues. Run four was with a new group and we had one wipe. Again we reset and cleared it. Run five was rocky but we made it through. The patch notes do not say anything specific changed with this encounter but we felt some things were different. The Spider Queens AoE was much stronger and she spat webs at us. The hardest thing to remember was that the AoE was actually a danger as before you could stand in it without issue. Once my groups had that in mind it was actually quite easy.

The Spider Queens web attack snares Keti.
Another changed we noticed at this point was the big door blocking passage to the rest of the dungeon. This door does not disappear until the Spider Queen encounter is complete. I have never skipped the spider before as the reward it gives is worth the effort so this change actually does not effect me. I didn't even notice it on the first run through.

The Stalker evades my attacks.
Next you fight a group of gravelings which highlight some of their new abilities. They will knock you down and bleed you a lot more and the Graveling Stalker has an annoying evade ability where it turns transparent and is immune to direct damage for a time. This is kind of annoying but all-in-all individually gravelings aren't any bigger of a threat, but whenever they get together in groups they are extremely dangerous as they can chain knockdowns and knockbacks that will leave you crying.

Kholer face tanks like a man.
The next major encounter is Kholer. Kholer is a thorn in the side of a number of people. I have never really had any issues with him. Once you know how to look for his tell (he raises his sword in the air) then the fight is rather trivial. The most obvious change to this encounter is that Kholer now spawns minions throughout the fight. Now it doesn't matter if you pull him away from his spawn location you will always have to deal with some adds. We simply focused the adds down and kept an eye out for Kholer's pull and we did fine. Occasionally someone would go down, we would laugh, and get back to it. Finally, it seems like Kholer performs the pull less often and his spin attack does less damage. I let him pull me in once and stood still during the spin attack and survived with around 100 HP. Overall, this encounter is much easier. We fought Kholer straight up three of the fives times I ran through AC and had no wipes.

On the other two runs the Cave Troll spawned and we lured it to Kholer for a fight. Kholer beat the Troll on both occasions and we cleaned up. We could tell that the Troll had a number of new abilities including a glowing projectile attack which bounces from one target to the next. He also performs a jump with a radial knock back along five directions. I kind of wish they would put the Troll in places that forced your team to fight him. The temptation to lure him to Kholer for a show down is too great for most parties to turn down.


Path One


The next encounter to discuss is Path 1's Burrow Room. The burrows no longer spawn Breeders and instead they seem to spawn higher quantities of the lesser gravelings. I did this encounter twice and both times it proved a challenge. Both times we attempted the "traditional" method with one person defending and the rest taking down the burrows. Of the three or four times we tried this it always failed. As our experienced defender said, "Holy crap there are way more gravelings now." Other strategies that failed; a  two pronged blitz across both sets of burrows, three defenders with two attackers, and two parties for each side of the room. 

Map of the strategy outlined.
Both times we succeeded we had to have strong coordination placing party members where they were strongest. The strategy we employed was actually quite complicated and it will help to give the players names to better describe it. Lets call them A, B, C, D, and E. A, B, and C start on the western burrow and D and E start on the burrow just above Hodgins (top image).

A, B, C quickly destroy the western burrow while A moves on to the next burrow in the chain. B and C stayed behind where the first burrow was to screen the gravelings and finish them off. While this is going on D and E are killing the trash the comes out of the upper burrow without killing the burrow itself. Once B and C clear their gravelings C moves to the eastern side of the room to join D and E. B stays on screening duty (2nd image).

At about this point A will finish off their burrow and will join B and finish off any gravelings in the area. Now the action shiftd to the eastern half of the room. C will continue screening the upper burrow while D and E break off and down the final burrow in the first chain (3rd image).

Once that burrow is destroyed a lot of pressure is relieved. A and B will probably still be dealing with gravelings on the western half of the map while C, D, and E finish up the upper burrow and the one that comes after it. Each time they are leaving someone behind to screen and clear the gravelings that that left over. Once the final mound appears A and B will be in good position to attack it while C, D, and E protect Hodgins from the remaining gravelings (bottom image).

This wasn't easy either time we went through. When we did finally lock down the strategy it felt right and it actually went REALLY smoothly. It might not happen the first time you try. Don't be discouraged. You might need to come up with your own strategy for your party composition. Having the right people in the right place goes a long way.

The Death Beam. Don't get derped.
To wrap up Path 1 we fought the Howling King. The first time I fought him my party cleared it no problem. The second time, however, we had great difficulty taking about 5 or 6 tries to finally crack it. There are a number of things to watch out for in this encounter. Firstly, is the death beam that the Howling King will let loose. It will down you and then keep going til you are dead. Luckily it seems to be very narrow and is easy to dodge. He also performs a small cone scream to those in front of him. The scream does little damage but it will cripple you and put about five stacks of confusion on you. This attack is subtle but deadly. If that wasn't enough to keep you busy there are also fire traps on the ground that are deadly to you and to the gravelings in the encounter.

The strategy going into this was to stay tight as a group and kite him around in a circle through the different fire traps. While that works in theory it usually quickly turned into a cluster with every one kind of having to look out for them selves. If you had gravelings on you then you kited them into a fire trap and they died. If not you put your best DPS on to the Howling King. Eventually everyone got the rhythm of the fight and we got it done. At one point I was the last one up with him at about 10% HP. My party encouraged me to go forward and try to solo it. I got him so close (like a hair away) before a graveling jumped me. Though I tried to get up with Shadowstep I wasn't quick enough and was quickly jumped by three more gravelings and that was that.

Another death beam shot. Notice the fire traps.
In retrospect, I had to think about why my first run went so cleanly and I think it was because we natural fell into a rhythm of having three people on the Howling King while two others intercepted the gravelings. It all happened really quickly and I didn't really even get a chance to see what we did right. The fight is not in any respects trivial nor was the first group any better then the second. Thus, I think there are two strategies in this encounter. One would be an every man for himself style like my second group ended up using. Everyone needs to have strong condition removal and at least one stun breaker. The strategy here is that everyone looks after themselves. Ressing is tricky if you don't have a thief with Shadow Refuge as the gravelings will make mince meat of those reviving. The best bet is to keep moving and if you have gravelings on you burn them in the fire. The other strategy would be to have some players intercept the incoming gravelings BEFORE they get to those DPSing the Howling King. Once agro'd the gravelings are very hard to loose.


Path Two


Next lets talk Path 2. The first encounter in this path is the trap room. Both times the trap room went down smoothly. In both instances, I took on the role of kiting the gravelings while the other four worked the traps. I derped on the second go and let the Breeder get past me. Luckily my party was fast acting and the person with the Breeder's agro joined me kiting and another took over the centre trap. I payed for my derp with my life so at least there was that justice. The first try though I did it no problem. I didn't even go down and usually I do (not that it is a big deal as you just rally of a dying graveling) and I was kiting on my own which I don't normally do.

Bathing in the AoEs.
The major difference in Path 2 was at the end of the encounter. Firstly, the Ascalonian ghosts which attack Detha, while she set up her traps, were much easier. I can not even begin to describe how much less damage they do. I remember standing in an area overlapping with Necromancer AoEs and laughing at how little damage I was taking. Both times we breezed through this part. This was a nice change as usually this is by far the hardest part of the path and probably the dungeon and it shouldn't be. It isn't a boss fight or anything. Thus, this was an excellent improvement.

The "Ghost Shield" buff. Also notice the boss' description.
The Ghost Eater is completely different than before. On the first run through we derped around for quite a while trying to figure out what exactly we had to do. It took about 5 minutes then we had it and finished the encounter without incident. The first thing to notice is the new buff on the Ghost Eater called "Ghost Shield". You know this buff is up when the Ghost Eater looks like a ghost. One of the effects of this shield is to make the The Ghost Eater invulnerable. The other effect is to cause to her to spawn oozes when attacked. Next thing to notice are the guns strewn about the room. The guns have two abilities, a lift and a pull. Neither does anything on its own but when an ooze is lifted it can be pulled. Once an ooze is pulled into range of a trap it will dissolve and provide power to the trap. Three oozes will completely power a trap. Once the Ghost Eater enters the area of a charged trap it will remove the Ghost Shield buff at which point you are free to do damage.

The Ghost Eater in Ghost mode next to a trap.
The second run was dicey and we wiped twice. The main danger in this fight is the AoE attack that the Ghost Eater performs. He will spit out goo that coats the floor doing big chunks of damage. You really need to avoid this. Luckily he will target one person and that person needs to kite the Ghost Eater around while the others take care of charging the traps. I would recommend kiting the Ghost Eater around a pole. That worked best for me. Keeping the Ghost Eater busy is important as the AoEs will block the traps.

When the trap explodes a bright wave of light passes
over the Ghost Eater removing his buff.
As I see it there are two strategies you can employ. Firstly, you can do one trap at a time. The down side to this strategy is that the Ghost Eater can heal. It seems that he will release the oozes when attacked for a short period of time. When that time is up the oozes left will return to the Ghost Eater healing her. If you are quick there won't be problems if not then strategy two might be for you. This involves charging all three traps and then pulling him from one to the next. That should be enough to kill him. The down side to this is that you need to have someone in your party that can kite the Ghost Eater long enough to charge all the traps. I tried doing this for my party with some success. It wasn't easy though.

Some general tips for this encounter would be to have all party members turn off auto attack. Attacking the Ghost Eater while he has his buff up will only cause oozes to spawn that will eventually heal him. Also, assigning party members as either pull and lift before you start and sticking to these assignments will help. Nothing is worse then lifting an ooze at the same time three others do. If your party is extremely coordinated then you might even have two groups with one pull and one lift in each focusing two oozes. My groups simply targeted an single ooze. The lifters lifted and the pullers pulled. Sometimes this was dicey but it got the job done.


Path Three


Finally, we come to part 3. I only ran this path once on the first night after the patch. And unfortunately all my screenshots from the first night didn't actually get taken. I blame FRAPs, FRAPs blames me. Whatever. There isn't much too see in this path that is different anyway. Most of the screenshot below were taken from this video which I have embedded below.

The Lovers room went down with no problems. We just ran from burrow to burrow quickly downing them. We weren't pro or anything and after the first five or so burrows were spinning around looking for the next one. Common sense of targeting the burrow when you see it payed off and we breezed through.

You can see the large AoEs from the roof collapse.
The boss fight with Colossus Rumblus was challenging. We lost a party member right before the fight as well and were unable to replace him due to people being on different builds that night. In the end we did four man him. The main mechanic with this fight is basically the entire roof collapsing in on you and your party. The only place to take shelter from this is near the NPC named Grast who will put up a shield to defend everyone... sometimes. Whether he is meant to shield your group every time I do not know but it seems bugged to me. Right before Rumblus triggers the roof to cave in he waves around and kind of glows green. This seemed perfect for an interrupt but this also seems bugged. I hit him with a number of Headshots and was unable to interrupt the ability even though "interrupted" would display. On the forums Robert Hrouda is calling it bugged.
Hmm, that seems like a bug. It was intended that you could interrupt the howl that caused the rocks to fall. I’ll send that over to our QA and get it verified.
Here the tell that indicated Rumblus
is about to make the roof collapse.
Not sure how something like that slipped past them but alright. My party wiped a about a dozen times trying to crack this one. We even got wiped about 15 seconds into the encounter one time. Positioning is everything in this fight. If you get hit by the falling roof you get knocked down. If you get knocked down and do not have a way to get up you are going to go down and most likely will die. Ressing people is extremely difficult and it is best you just do not go down in the first place. Watch for Rumblus' tell and get near Grast for protection. Then watch out for Rumblus as he has knock backs that can hit you out of the shielded area.

This is where I bring up the third potential bug in this encounter. If your party wipes you will need to rez Grast to even have a hope in your next fight. The problem is Rumblus will most likely be pathing over top over his dead body. Not only that once you do get Grast up he will pull a Leroy Jenkins into the fight at 50% HP. This isn't enough HP for him to survive the entire fight and he will go down again. You either need to get him back up or get dodging because he is your only line of defence. Some how he did go back to full HP for us and that was also the time we defeated Rumblus as we had Grasts' help the entire time.

The final thing to mention about this encounter is that there might be a safe spot outside Grast's shield. While we were playing we noticed a spot under the archway of the ruins that seemed to be devoid of falling rocks. Shortly after spotting this we finished the encounter without getting a chance to test this. I did find this Youtube video of a guy using that spot to his advantage though.


It hasn't been confirmed on whether this is intentional or not but while the rest of the event is bugged I see no harm in taking advantage of this. This is a challenging fight without a doubt. Once the bugs are fixed it will most likely be enjoyable. Being able to interrupt the roof caving in will go a long way. Personally, I wish that the shield ability that Grast performed was in the hands of a player. Relying in an NPC is lame. Instead I feel there should be an item that a player can hold to generate the shield or be a thing sitting in the middle of the room that can be activated.


Conclusion


I think this has turned into the longest post I have ever written (I am also still finding grammer errors. Sorry one man show here!). There was a lot to talk about and I am not done yet! A lot of my guild mates have been asking me, "Is AC easier or harder now?" My answer to them is that it is neither. Some parts are easier some parts are harder. Overall, I would say it is more interesting. The mechanics for the boss fights are challenging and exciting. They definitely keep you on your toes and require cooperation. The only thing I would say this dungeon needs now are more spotlight moments and it would be brilliant.

Meh loot.
Thanks Kholer.
If this is the path that Arena Net plans to take with all the dungeons then by all means carry on. These changes are excellent and much needed. I would also imagine that a number of new strategies will emerge in the next couple weeks that will help everyone in completing these dungeons in record times. The biggest hinderance to running the new AC will be your previous expectations to what the fights will be like. Go into the Spider Queen fight assuming the AoEs are no big deal and you will die. Assuming you can get away running dungeon without a stun removal will get you killed. If you put your brain to the task though and drop your expectations you will be fine. Just do not expect PUGs to know what to do or for that matter to even be aware that the dungeon has changed for the next month. If you aren't willing to put up with a wipe or two then do not run this dungeon until people learn what they are doing or stick with those that you know have completed it post patch.

Sorry about the long post. I hope some of you have made it to this point. If so, let me know what your take on the new AC is? Have you run it? If not, what do you think of my take on it? Does it make you want to find a group and get out there and give it a go? Or does it intimidate you into not wanting to try? Let me know in the comments!